Prep: Converting The Bias Balance to a Bias Adjustment

Last year when I started messing with the Bandmaster, I bought How to Hot Rod Your Fender Amp by Jeffrey Falla. I’ve read the first 6 chapters a few times now, and after practicing my soldering skills on my DS-1, I think I’m ready to jump in.

Falla suggests performing this mod on all silverface amps that haven’t already received it. He also suggests that it is rare to find a silverface amp that has not already had this modification done. Mine certainly falls in this category.

When I first tried to figure out when the amp was built, I had issues placing it and reasoned that it was from 1969 by looking at the information I had available. I may need to try and date the amplifier again (and do a better job of recording what I was looking at to do so), because the electronics (at least for the bias circuit) match the “1968 Silverface Bias Circuit” diagrams in the book.

I had to look at the diagrams and read the procedure a few times with the amp open to understand what I need to do, but now that I get it I think this will be pretty simple to pull off.

I’ve ordered my parts (2, 220K resistors and a 47uF 100V electrolytic capacitor). Once again, I’m nervous/unsure about what brand of components to buy and how much to care about all the specs that the author doesn’t go into. For example, what power/voltage rating should the resistors have? Does it matter? For the record, I bought Xicon resistors with a 3W power rating and a 350V voltage rating… Hopefully that is sufficient.

The parts cost me $6.54 (76.3% of which is shipping) and should get here in a couple weeks. 🙂

Sound! — New Filter Capacitors

I’ve been doing some reading the last few months on common maintenance tasks for these amps and have seen multiple places state that the filter capacitors should be changed every 10 years or so. The capacitors in this amp were still the original set, so some new ones were certainly in order.

Original Capacitors

The amp had paper Mallory capacitors installed. 2 70-uF 350VDC and 3 20-uF 500VDC. I was having difficulty finding replacement capacitors at the exact same ratings and, after some research and what probably amounts to way too much toiling over this detail, I ordered what seemed to be acceptable replacements. 2 F&T 100-uf 350VDC and 3 F&T 22-uf 500VDC capacitors. There appears to be quite a lot of debate around the ideal brand of capacitors that should be used for these amps. Sprague Atom, F&T, Ruby, and Illinois come up quite a bit. Sprague Atom’s seem to be popular because their size more closely matches the size of the original Mallory capacitors. They are also decently more expensive. After I saw a few forum posts indicate that if you cut a Sprague Atom capacitor cut in half you would find that the extra space served no real purpose beyond making the capacitor look larger, my mind was made up and I opted for the less-expensive (and physically smaller) F&T capacitors. The Sprague Atoms may sound a whole lot better. I really wouldn’t know unless I found a way to easily alternate between both and listen to the differences. Perhaps this is something I’ll be able to experiment with later.

Original Mallory Capacitors

The only bump we really hit in replacing the filter capacitors, is that it wasn’t clear by looking at the originals where the solder points should be. We experimented with pulling the entire capacitor out, but realized that underneath the black pad there were wires connecting the capacitors directly to each other. I’m not sure if this is the “right” way to do it, but what we ended up doing was cutting the existing capacitors out and leaving a “post” from the originals in place. We then soldered the new capacitors to our “posts”. I’ve since looked at photos of amps with new filter capacitors installed and am still unable to determine the technique that was used to attach the capacitors. This is something I still need to figure out and I’m certain that a well-placed forum post would yield no less than 3 conflicting responses :).

New F&T Capacitors

Once the new capacitors were soldered in, we hooked everything up and… sound! I was expecting noise. I thought once we turned it on we would get crackling, distorted, in-and-out noise but the actual sound was very clear and I had to try and listen for static if the guitar was completely off. The tone was clean and strong with nice present highs and decently full lows. The mids felt a bit under-served to me, but that could have been due to the cabinet or the speakers. We mostly played the amp at a 3, and found that it started to break at about the 5, which is a tad disappointing because I’m not sure how often I’ll have the opportunity to take it up that loud.

The only real issues we discovered were that all the knobs were scratchy, the reverb isn’t functioning, the plug had the ground pulled out of it, and one of the speakers in the original cabinet seems to be out. We put cleaner in the pots for the knobs which seemed to help out quite a bit and I’ll be researching the other issues in the coming months.

I think the next major item I’ll try to work on will be learning how to bias the amp correctly.

Dad playing the rejuvenated Bandmaster

The How and the Why

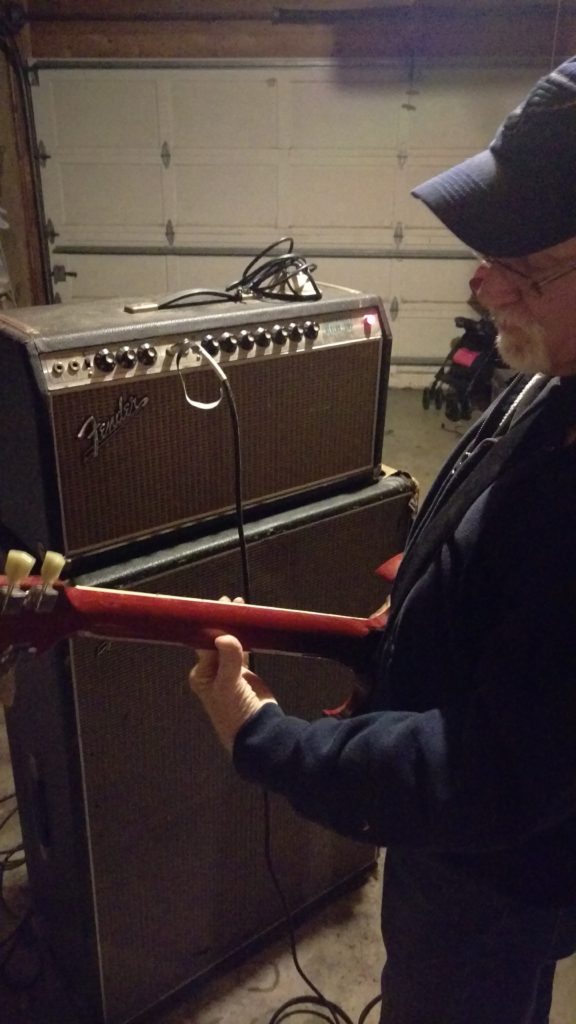
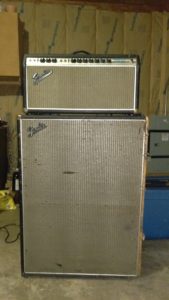
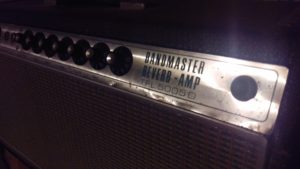
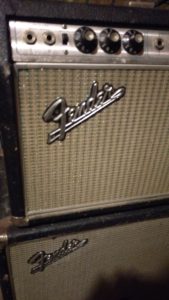
I have a 1969 (I think) Fender Bandmaster Reverb TFL-5005D (Silverface) head and cabinet in my garage.

imag0292

When my father was in high school, he didn’t own a gig-worthy amplifier. When his band had a job, he would call up a “friend of a friend” that would let him rent his Fender Bandmaster Reverb for the weekend. After doing this for sometime, he was offered the opportunity to buy the amp for $200 and he jumped on it. This amp was the muscle of his gigging rig through the 1970’s and into the 1980’s. Eventually he picked up a Fender Twin and, after using the twin to drive this cabinet for sometime, the Bandmaster was retired.

It spent a number of years in a shed where his band stored their gear.

It spent a decent amount of time in the garage of my childhood home. I have clear memories of asking my dad if we could hook it up. As I recall, he responded with some variation of “It’s broken.” When I was in high school, I didn’t own a gig-worthy amplifier and I so desperately wanted to use the Bandmaster. This was simply because the amp was much larger than my friends’ amplifiers, and it looked old and “vintage”. I didn’t know anything about the amplifier. I remember we talked back then about fixing it up. When I had a “gig” to play, I would borrow the Fender Twin. He didn’t even charge me rent.

imag0284

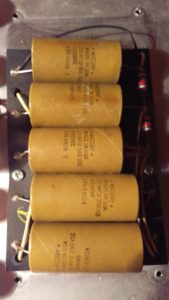
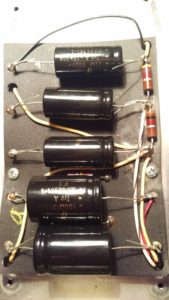
It moved around with him a few times until it ended up in another shed outside his current home and it stayed there until he decided to see what kind of condition it was actually in. He lugged it inside, plugged it in, turned it on, and heard a hum from the tubes warming up. In the amount of time it took him to retrieve his guitar and return, the amp started smoking. He turned it off and did some basic diagnostics. He figured that one or more of the filter capacitors must have failed. Not feeling like investing time and money into the amplifier just to discover additional issues with it, he returned it to the shed.

It was around this time that I was made aware of the amplifier’s status, and offered to give it a home in my garage.

As far as we know, no modifications have ever been done to the amp. It still has all of the original components except for the tubes.

This project is scratching a few itches for me.

imag0297

First, I have never owned a tube amp and don’t know much about them. My Fender Stage 160 has been a loyal companion over the years. I played out quite a bit in college, but could never afford a nicer amp. The groups I’ve played in after college haven’t really played out enough for me to justify the cost of picking up a nicer amp. Besides, who needs the extra hassle of worrying about a tube going out at a gig? 😉

Second, I have always wanted to understand more about electronics. I know practically nothing about the topic. I recently bought a “learn how to solder” kit and can now poorly reproduce a European siren with a blinking light. I know the basics about capacitors and resistors, and that is about it. I’m hoping to use this project to learn about the tools, diagnostics, and general care and feeding of tube amplifier electronics. That said I’m probably going to make a lot of mistakes on this project. I consider this a good thing.

Third, it has absolutely nothing to do with writing software.

The primary order of business is going to be to get some kind of guitar-like sound out of the amplifier. Dad thinks the problem is the filter capacitors, so we’ll start there.